Unlocking the Interactive WebAssembly rendering mode in .Net 8.0 Blazor
When it comes to modern development, new technologies and new features are being introduced day by day. In this dynamic environment, Microsoft appeared with new rendering modes in their latest .Net 8.0 Blazor launch, offering developers to create static and interactive websites.
Embrace yourself to witness the extraordinary as we are going to explore the most awaited topic Interactive client-side rendering.
Exploring Real-life Scenarios for Interactive Wasm:
Imagine an online shopping website that provides users with a rich and interactive experience directly within their web browsers. Here we are going to see how interactive web assembly enhances the shopping journey.
- Users can customize the product attributes like colors, size, and material to instantly visualize the changes in the web browser.
- Users can search for specific products.
- Use web assembly to allow users to calculate the price of the products according to their inputs and customizations.
- Integrate web assembly to dynamically update rates and reviews of the products.
Unleashing the details of Interactive client-side rendering mode:
Interactive Client-side rendering allows the application to run interactively in the client’s browser using blazor web assembly. Blazor.webassembly.js (Javascript runtime for web assembly), .wasm (Compiled .Net runtime), and .dll (Compiled .Net Assemblies) are downloaded and cached when the component is rendered initially.
Getting Started with the Interactive Wasm Rendering in Visual Studio 22 using .Net 8.0 Blazor
Below is the step-by-step guide to explore and understand the working of Interactive Web Assembly Rendering mode:
Step 1: Create a new project in Visual Studio
- Select the Blazor web app project and give your project a specific name and location.
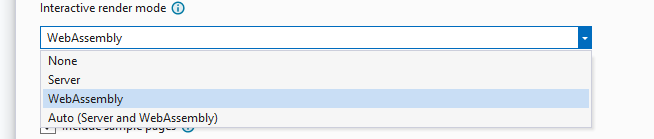
- In the additional information, from the given 4 rendering modes, select WebAssembly to make client-side interactive.
- Apply interactivity location to the project. There are two options available:
- To apply client-side interactivity on a particular page or component use Per page/component.
- To apply client-side interactivity on a particular page or component use Per page/component.

Here we are going to use the per page/component option.

Step 2: Configuring Interactive Wasm Rendering mode in the Program.cs file
Now that we have set up the project, the next step is to explore the code and see how to enable and configure interactive client-side rendering in program.cs which is placed in the server project with a name that does not end with .Client.
The following services and configurations are required to enable Interactive client-side rendering:


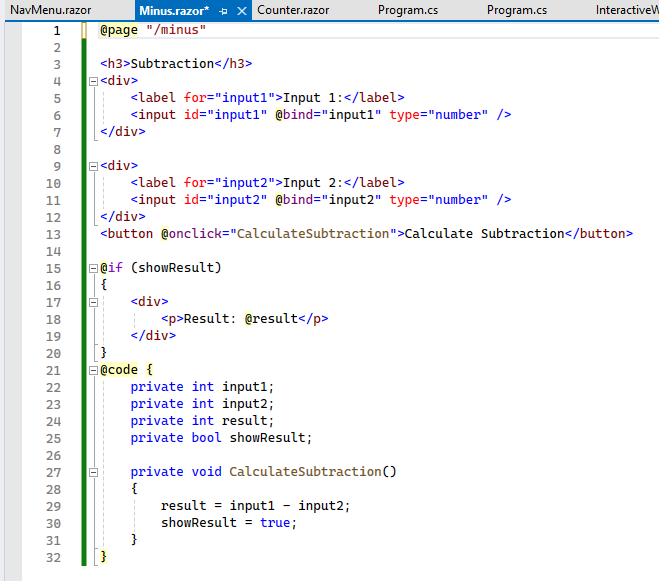
Step 3: Create a Minus.razor component
Following is the code to subtract two numbers and display the result.
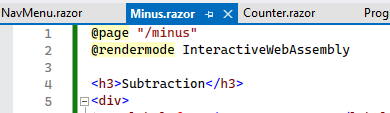
Step 4: Make the component Interactive
To make the component interactive at client-side rendering, add @rendermode InteractiveWebAssembly to the component definition.
Step 5: Build the project and run
Step 6: Inspect the browser
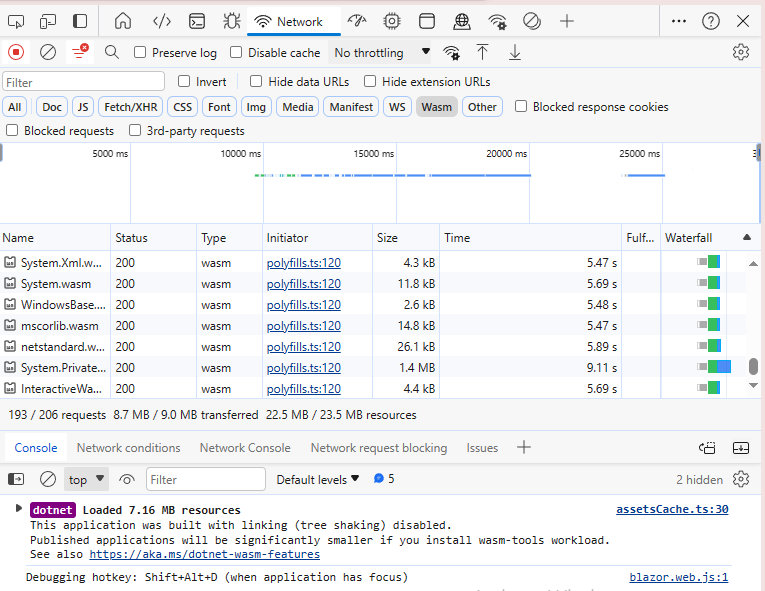
- To explore queries like Is interactivity enabled? What interactivity is used in this component? Let us inspect the window.
- Here in the Network inspection under the WASM, you can see the web assembly resources are downloaded on the client side.
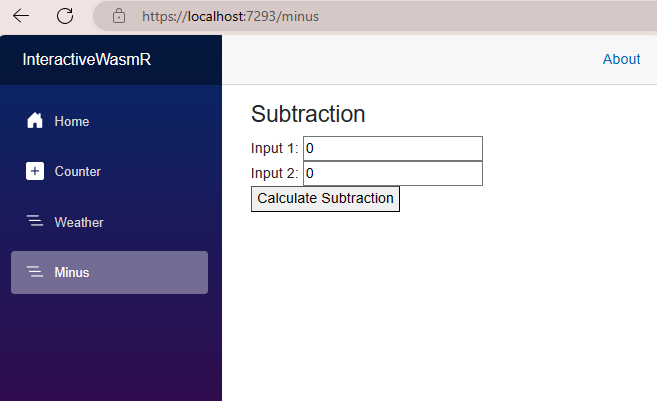
- To see if the interactivity is working or not, give some values in the field and click the button. If the result updates it means the interactivity is enabled.
- In the above example as you can see, two inputs are being subtracted and the result is updated as soon as the button is clicked.
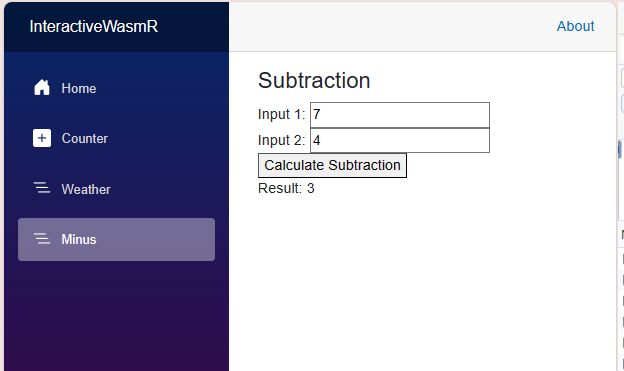
In short, the component is interactive and runs in the browser using interactive web assembly rendering mode.